
This 5-minute post with code demonstrates a simple solution to documenting your Spring Boot Microservice API with Swagger.
Overview
A very important and often overlooked aspect of API design is documentation.
Swagger is an open standard that takes the manual work out of API documentation. It’s an easy and popular choice in Spring Boot applications.
We will run through the simple steps to add Swagger to any Spring Boot Microservice.
- Add the maven dependency.
- Create your Microservice API.
- Add an interface for the Swagger information
Running The Example
This example uses Spring Boot 3.1.2 and Java 17.
You can download and run the source code as follows.
git clone https://github.com/johndobie/spring-boot-swagger.git
mvn clean install spring-boot:run
You can then see the results here
http://localhost:8080/swagger-ui/index.html#/
Implementing Swagger and Spring Boot Microservices
Step 1 – Add the maven dependency
This is pretty simple and requires just the following library:
   <dependency>
      <groupId>org.springdoc</groupId>
      <artifactId>springdoc-openapi-starter-webmvc-ui</artifactId>
      <version>2.1.0</version>
   </dependency>
Step 2 – Create your Microservice API.
Now you can add the swagger annotations directly to your controller, but I find that makes your controller a little untidy. So we are going to create a separate interface and add the Swagger annotations to that.
First, let’s look at a simple controller that echoes a model back to the client.
The model is very simple
public class EchoModel {

    @Size(min = 1, max = 15)
    @NotNull
    private String name;

    @Size(min = 1, max = 30)
    @NotNull
    private String message;
}
The controller is too
public class EchoController implements EchoControllerSwagger {

    public static final String ECHO_MODEL_ENDPOINT = "/echo/model";

    @PostMapping(value = ECHO_MODEL_ENDPOINT)
    public EchoModel echoModel(@RequestBody @Valid EchoModel model) {
        return model;
    }
}
Step 3 – Add a Swagger interface.
Now you could add the swagger annotations directly to your controller, but I find that makes your controller a little untidy. So we are going to create a separate interface and add the Swagger annotations to that.
It’s not very complicated, but it is a little verbose.
@Tag(name = "Echo Microservice", description = "This Microservice will echo the model passed in the response.")
public interface EchoControllerSwagger {

    @Operation(operationId = "EchoController", description = "This is a Description of this API call", summary = "This method will echo its request body")
    @ApiResponse(responseCode = "200", content = @Content(mediaType = "application/json", schema = @Schema(implementation = EchoModel.class)))
    public EchoModel echoModel(@RequestBody @Valid EchoModel model);
}
The @Tag, @Operation and @ApiResponse annotations are enough to get you started.
You then only need to add the new interface to your Controller.
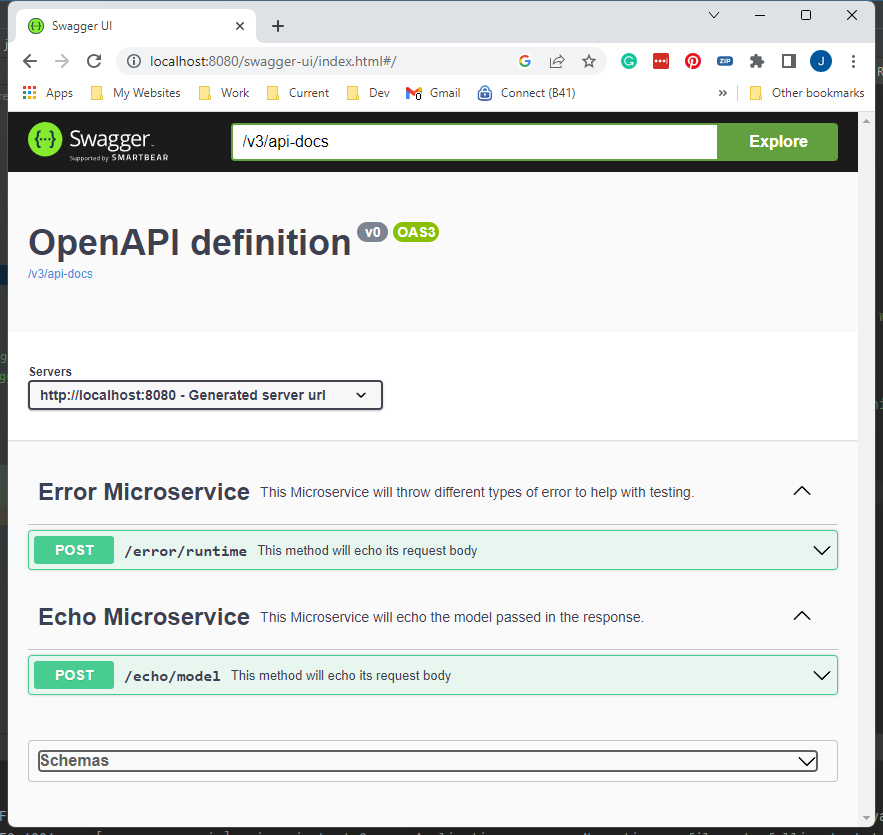
public class EchoController implements EchoControllerSwaggerNow you can run your Microservice and see the API:
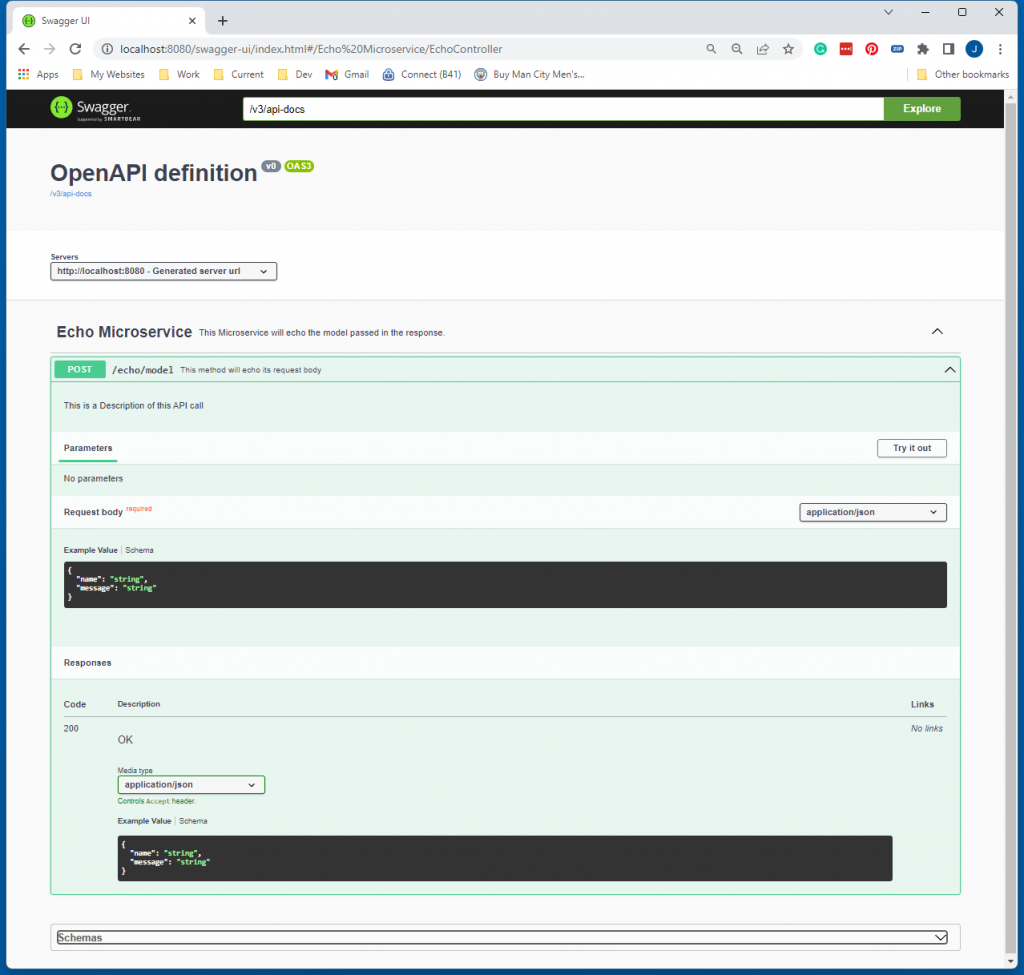
You can see the endpoint and the parameters required to make a call.
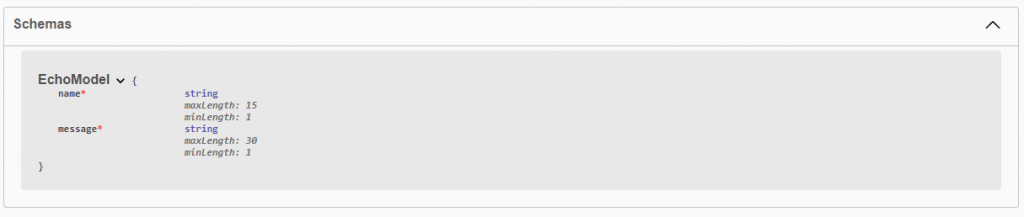
If you take a look at the schema section, you can also see any constraints.
Extracting The Interface.
As well as the UI component we can extract the whole API model as both yaml and json. These can then be used in standard API tooling.
- The json endpoint is http://localhost:8080/v3/api-docs
- The yaml endpoint is http://localhost:8080/v3/api-docs.yaml
Next Steps.
In terms of Swagger and Spring Boot Microservices, there are lots of options for the customisation of the API and the way it runs.
You can find more about the specifics below.
https://springdoc.org/#swagger-ui-properties
Other Blogs You May Like
https://johndobie.com/blog/chatgpt-with-java/
https://johndobie.com/blog/feature-flags-in-java-spring/


Leave a Reply
You must be logged in to post a comment.